使用Python+OpenCV进行图像处理(三)
我们的英雄在哪?
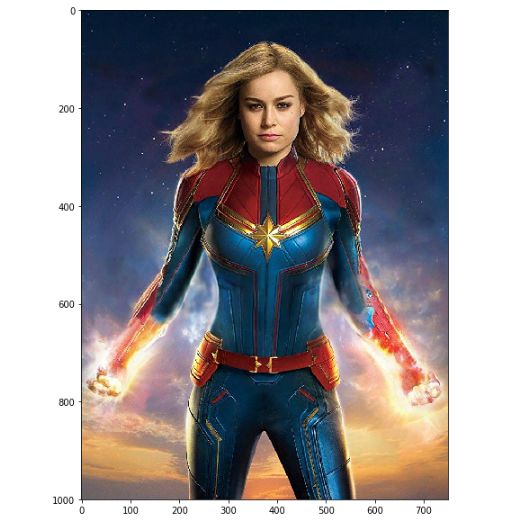
接下来让我们使用上述级联分类器实现漫威英雄面部检测--惊奇队长面部检测。

001 (15)
我们只须使用图像中的一部分即头部部分。首先,获取惊奇队长脸部周围感兴趣区域;然后把图像转换成灰度图。之所以只使用一个通道,是因为我们只对特征的像素值强度变化感兴趣。
cap_mavl = cv2.imread('images/captin_marvel.jpg')
# Find the region of interest
roi = cap_mavl[50:350, 200:550]
roi = cv2.cvtColor(roi, cv2.COLOR_BGR2GRAY)
plt.imshow(roi, cmap = 'gray')

通过下方代码使用Haar级联分类器。
# Load Cascade filter
face_cascade = cv2.CascadeClassifier('haarcascades/haarcascade_frontalface_default.xml')
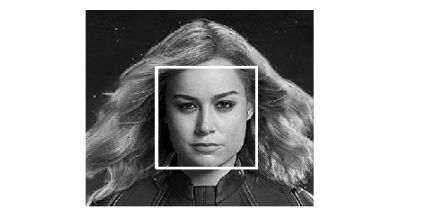
接下来,我们将创建一个函数来检测人脸并在目标区域周围绘制一个矩形。为了检测人脸,我们可以使用上面加载的分类器face_cascade的. detectmulitscale()方法。它返回指定区域的四个点所以我们在那个位置画一个矩形。scaleFactor是一个参数,表示在每个图像尺度上图像大小减少了多少,minNeighbors表示每个候选矩形应该训练多少个邻居。现在我们把这个函数应用到图像上,看看结果。
# Create the face detecting function
def detect_face(img):
img_2 = img.copy()
face_rects = face_cascade.detectMultiScale(img_copy,
scaleFactor = 1.1,
minNeighbors = 3)
for (x, y, w, h) in face_rects:
cv2.rectangle(img_2, (x, y), (x+w, y+h), (255, 255, 255), 3)
return img_2
# Detect the face
roi_detected = detect_face(roi)
plt.imshow(roi_detected, cmap = 'gray')
plt.axis('off')

正如看到的那样,haar级联分类器取得了不错的人脸检测效果。接下来,让我们尝试检测含有多张人脸的图片。
# Load the image file and convert the color mode
avengers = cv2.imread('images/avengers.jpg')
avengers = cv2.cvtColor(avengers, cv2.COLOR_BGR2GRAY)
# Detect the face and plot the result
detected_avengers = detect_face(avengers)
display(detected_avengers, cmap = 'gray')

很明显检测结果不完全准确。出现了错误捕捉“非人脸”目标以及丢失了部分“真实人脸”。有趣的是,它成功地探测到了蜘蛛侠,却把美国队长和黑寡妇的手误当成了眼睛。通常在人脸图像凸显出更加清晰的五官时,可以得到更好的人脸检测结果。
尝试检测自己的脸
接下来介绍使用网络摄像头检测人脸的实现方法。类似上方的实现方式。代码如下方所示。可以通过ESC按键终止退出检测。
import cv2
import numpy as np
# Step 1. Define detect function
face_cascade = cv2.CascadeClassifier('haarcascades/haarcascade_frontalface_default.xml')
def detect_face(img):
img_copy = img.copy()
face_rects = face_cascade.detectMultiScale(img_copy)
for (x, y, w, h) in face_rects:
cv2.rectangle(img_copy, (x, y), (x+w, y+h), (255, 255, 255), 3)
return img_copy
# Step 2. Call the cam
cap = cv2.VideoCapture(0)
while True:
ret, frame = cap.read(0)
frame = detect_face(frame)
cv2.imshow('Video Face Detection', frame)
c = cv2.waitKey(1)
if c == 27:
break
cap.release()
cv2.destroyAllWindows()
总结
本篇介绍了传统的边缘检测、角点检测以及人脸检测方法。下篇将介绍轮廓检测技术等。敬请期待。

最新活动更多
-
即日-1.24立即参与>>> 【限时免费】安森美:Treo 平台带来出色的精密模拟
-
2月28日火热报名中>> 【免费试用】东集技术年终福利——免费试用活动
-
即日-3.21立即报名 >> 【深圳 IEAE】2025 消费新场景创新与实践论坛
-
4日10日立即报名>> OFweek 2025(第十四届)中国机器人产业大会
-
7.30-8.1火热报名中>> 全数会2025(第六届)机器人及智能工厂展
-
即日-2025.8.1立即下载>> 《2024智能制造产业高端化、智能化、绿色化发展蓝皮书》
推荐专题


 分享
分享


发表评论
请输入评论内容...
请输入评论/评论长度6~500个字
暂无评论
暂无评论