nginx负载均衡一些配置的实战演示!
#
error_page 500 502 503 504 /50x.html;
location = /50x.html {
root html;
}
# proxy the PHP scripts to Apache listening on 127.0.0.1:80
#
#location ~ .php$ {
# proxy_pass http://127.0.0.1;
#}
# pass the PHP scripts to FastCGI server listening on 127.0.0.1:9000
#
#location ~ .php$ {
# root html;
# fastcgi_pass 127.0.0.1:9000;
# fastcgi_index index.php;
# fastcgi_param SCRIPT_FILENAME /scripts$fastcgi_script_name;
# include fastcgi_params;
#}
# deny access to .htaccess files, if Apache's document root
# concurs with nginx's one
#
#location ~ /.ht {
# deny all;
#}
}
# another virtual host using mix of IP-, name-, and port-based configuration
#
#server {
# listen 8000;
# listen somename:8080;
# server_name somename alias another.alias;
# location / {
# root html;
# index index.html index.htm;
# }
#}
# HTTPS server
#
#server {
# listen 443 ssl;
# server_name localhost;
# ssl_certificate cert.pem;
# ssl_certificate_key cert.key;
# ssl_session_cache shared:SSL:1m;
# ssl_session_timeout 5m;
# ssl_ciphers HIGH:!aNULL:!MD5;
# ssl_prefer_server_ciphers on;
# location / {
# root html;
# index index.html index.htm;
# }
#}
}
这里内容比较多,我们现在自己来写一个配置文件来实现nginx的访问:
txp@ubuntu:/usr/local/nginx$ sudo mkdir demo_conf
txp@ubuntu:/usr/local/nginx$ cd demo_conf/
txp@ubuntu:/usr/local/nginx$ vim demo_conf/demo.conf
worker_processes 4;#进程数量
events{
worker_connections 1024;#并发访问数量
}
http{
server {
listen 8888;#监听端口
server_name localhost;#服务器名称
client_max_body_size 100m;#访问的数量大小
location / {
root /usr/local/nginx/html/ #访问这个本地服务器里面的这个html页面
}
}
}
现在我们来看一下我们自己配置的是否成功,先把之前的nginx关闭掉:
./sbin/nginx -s stop
然后再执行这个配置文件:
./sbin/nginx -c demo_conf/demo.conf

这里扩展一下基础知识点:
Nginx 由配置文件中指定的指令控制的模块组成。指令分为简单指令和块指令。一个简单的指令由空格分隔的名称和参数组成,并以分号(;)结尾。块指令具有与简单指令相同的结构,但不是以分号结尾,而是以大括号({和})包围的一组附加指令结束。如果块指令可以在大括号内部有其他指令,则称为上下文(例如:events,http,server 和 location)。配置文件中放置在任何上下文之外的伪指令都被认为是主上下文。events 和 http 指令驻留在主上下文中,server 在 http 中的,而 location 在 http 块中。
3、负载均衡、反向代理和静态资源的访问演示:
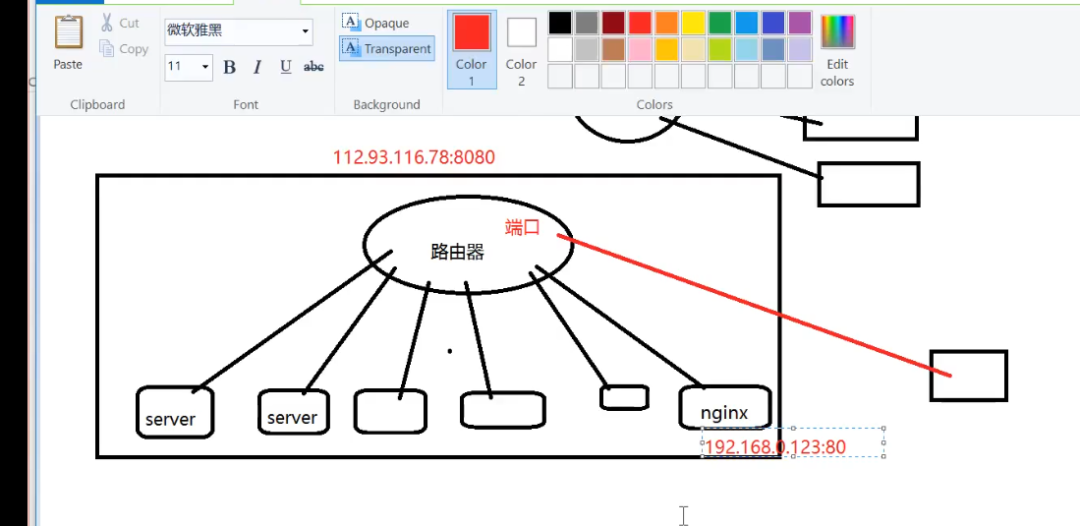
--反向代理原理(ReverseProxy):它是指以代理服务器来接受internet上的连接请求,然后将请求转发给内部网络上的服务器,并将从服务器上得到的结果返回给internet上请求连接的客户端,简单来说就是真实的服务器不能直接被外部网络访问,想要访问必须通过代理,如下图所示:

上图中有两个网关,一个是nginx应用层网关,一个路由器硬件网关,nginx和各服务器都是在同一个局域网里面;路由器它做了一个端口映射(nat)直接访问到nginx,给人的感觉nginx就在公网上面;
注意这里的服务器对外不提供服务的,通过nginx代理来向外提供服务;外面访问的是公网ip,然后通过端口映射找到nginx
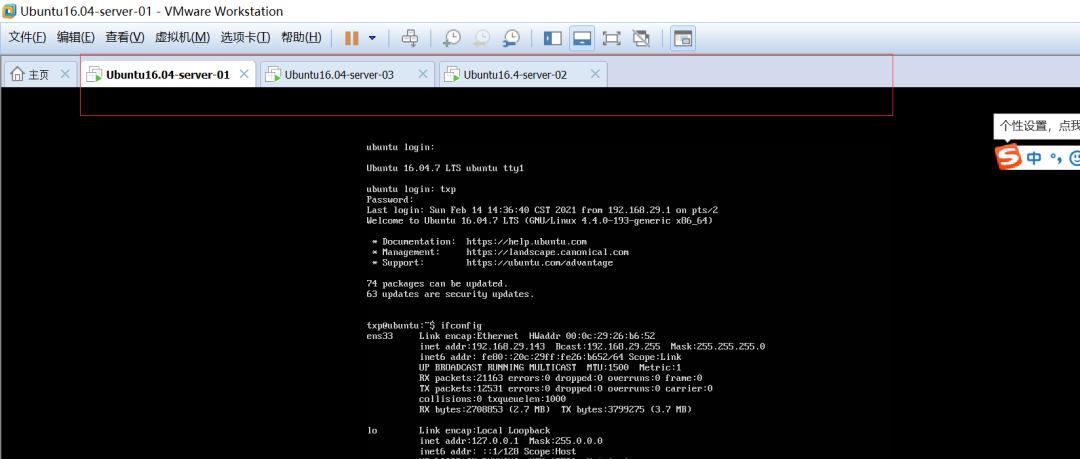
现在我们用nginx做代理配置(比如说我这里用143的这台机器代理141这台机器):
worker_processes 4;
events{
worker_connections 1024;
}
http{
server {
listen 8888;
server_name localhost;
client_max_body_size 100m;
location / {
root /usr/local/nginx/html/;
proxy_pass http://192.168.29.141;
}
}
}
注意:141的那台机器也安装nginx了,然后当我访问143这台机器的时候,其实访问的是141这台机器的内容,这就是代理的使用了:

-- 负载均衡:从负载均衡四个字来看,肯定是用来减轻服务器的访问压力的;比如说当一台服务器的单位时间内的访问量越大时,服务器压力就越大,大到超过自身承受能力时,服务器就会崩溃(比如每年双十一活动,淘宝就使用了nginx的负载均衡的功能,不然当天那么多的用户活跃在淘宝上,服务器肯定吃不消啊!)。因此为了避免服务器崩溃,让用户有更好的体验,我们通过负载均衡的方式来分担服务器压力。我们可以建立很多很多服务器,组成一个服务器集群,当用户访问网站时,先访问一个中间服务器(也就是我们的nginx),在让这个中间服务器在服务器集群中选择一个压力较小的服务器,然后将该访问请求引入该服务器。如此以来,用户的每次访问,都会保证服务器集群中的每个服务器压力趋于平衡,分担了服务器压力,避免了服务器崩溃的情况。
下面我演示负载均衡案例:
worker_processes 4;
events{
worker_connections 1024;
}
http{
upstream backend{
server 192.168.29.142 weight=2;//weight表示权重
server 192.168.29.141 weight=1;
}
server {
listen 8888;
server_name localhost;
client_max_body_size 100m;
location / {
# root /usr/local/nginx/html/;
# proxy_pass http://192.168.29.141;
proxy_pass http://backend;
}
}
}
注意:权重表示被访问的更多,这里由于我三台机器都安装了nginx,所以内容显示看不出什么不同之处来,其实142的机器被访问了2次,141的机器被访问了1次,我这里有三太机器:141、142、143:


-- 访问静态资源(图片和视频)
这里我在143的机器上放了几张图片,然后在/usr/local/nginx目录下创建了一个images文件夹,然后把143机器上的图片copy到images下面来:
root@ubuntu:/usr/local/nginx# ls
client_body_temp fastcgi_temp images proxy_temp scgi_temp vip_conf
conf html logs sbin uwsgi_temp
root@ubuntu:/usr/local/nginx# mv /home/txp/share/nginx.png images/
root@ubuntu:/usr/local/nginx# ls
client_body_temp fastcgi_temp images proxy_temp scgi_temp vip_conf
conf html logs sbin uwsgi_temp
root@ubuntu:/usr/local/nginx# cd images/
root@ubuntu:/usr/local/nginx/images# ls
1.png 2.png 3.png
然后进行conf文件配置:
worker_processes 4;
events{
worker_connections 1024;
}
http{
upstream backend{
server 192.168.29.142 weight=2;
server 192.168.29.141 weight=1;
}
server {
listen 8888;
server_name localhost;
client_max_body_size 100m;
location / {
# root /usr/local/nginx/html/;
# proxy_pass http://192.168.29.141;
proxy_pass http://backend;
}
location /images/ {
root /usr/local/nginx/;
}
}
}
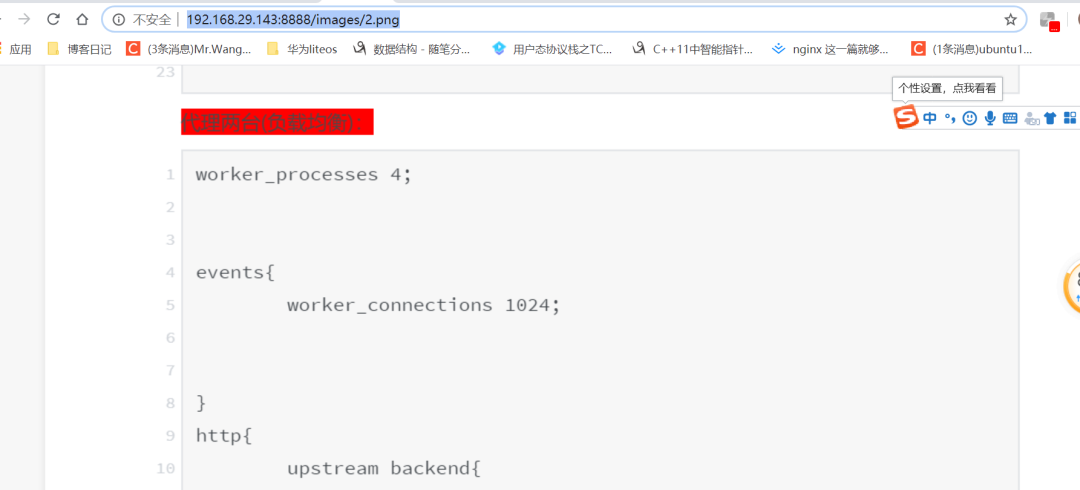
实现结果如下:

下面我在演示一下视频访问,同样,我创建一个media目录,然后把143机器上的test.mp4copy到media目录来:
root@ubuntu:/usr/local/nginx# mv /home/txp/share/nginx/test.mp4 media/
root@ubuntu:/usr/local/nginx# cd media/
root@ubuntu:/usr/local/nginx/media# ls
test.mp4
conf文件配置:
worker_processes 4;
events{
worker_connections 1024;
}
http{
upstream backend{
server 192.168.29.142 weight=2;
server 192.168.29.141 weight=1;
}
server {
listen 8888;
server_name localhost;
client_max_body_size 100m;
location / {
# root /usr/local/nginx/html/;
# proxy_pass http://192.168.29.141;
proxy_pass http://backend;
}
location /images/ {
root /usr/local/nginx/;
}
location ~.(mp3|mp4) #这里利用了正则表达式
root /usr/local/nginx/media/;
}
}
}
结果如下:

三、总结
今天就暂时总结这么多吧,还有cgi和fastcgi的使用和区别,就暂时不讲了,如果哪天有用到,再来实战演示。

最新活动更多
-
7月22-29日立即报名>> 【线下论坛】第三届安富利汽车生态圈峰会
-
7.30-8.1火热报名中>> 全数会2025(第六届)机器人及智能工厂展
-
7月31日免费预约>> OFweek 2025具身智能机器人产业技术创新应用论坛
-
免费参会立即报名>> 7月30日- 8月1日 2025全数会工业芯片与传感仪表展
-
即日-2025.8.1立即下载>> 《2024智能制造产业高端化、智能化、绿色化发展蓝皮书》
-
8月5日立即报名>> 【在线会议】CAE优化设计:医疗器械设计的应用案例与方案解析


 分享
分享


发表评论
登录
手机
验证码
手机/邮箱/用户名
密码
立即登录即可访问所有OFweek服务
还不是会员?免费注册
忘记密码其他方式
请输入评论内容...
请输入评论/评论长度6~500个字
暂无评论
暂无评论